-
Recipe: Broccoli sprout pesto
What if I told you that some foods are like a superhero: They pack a punch AND protect your body from all the baddies, one bite at a time. Yes, I’m being serious.
Well, friends, microgreens do exactly this! Microgreens are the young seedlings of edible veggies and herbs. They are typically harvested less than 14 days after germination, are nutrition packed and have the flavour of a grown plant. But – get this – they contain four to 40 times more nutrients than their mature counterparts! (Read more about it here, if you don’t believe me.)
So yes they are baby plants/veggies… but, like, imagine they were ninja babies. Exactly. They help to reduce the chances of diabetes, heart disease, Alzheimer’s and certain cancers… so one could say that they are the Mr Miyagi of veggies.
These ninja foods use to be a thing that you would find in health shops and in the trolleys of the hip and health conscious. (So, like, not people like me then). But more peeps are incorporating them into their dishes now. Some even prefer them, over their mature counterparts, due to the added antioxidant and phytonutrients.
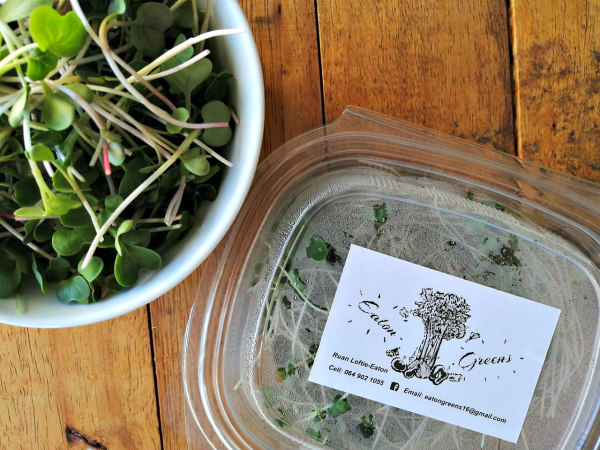
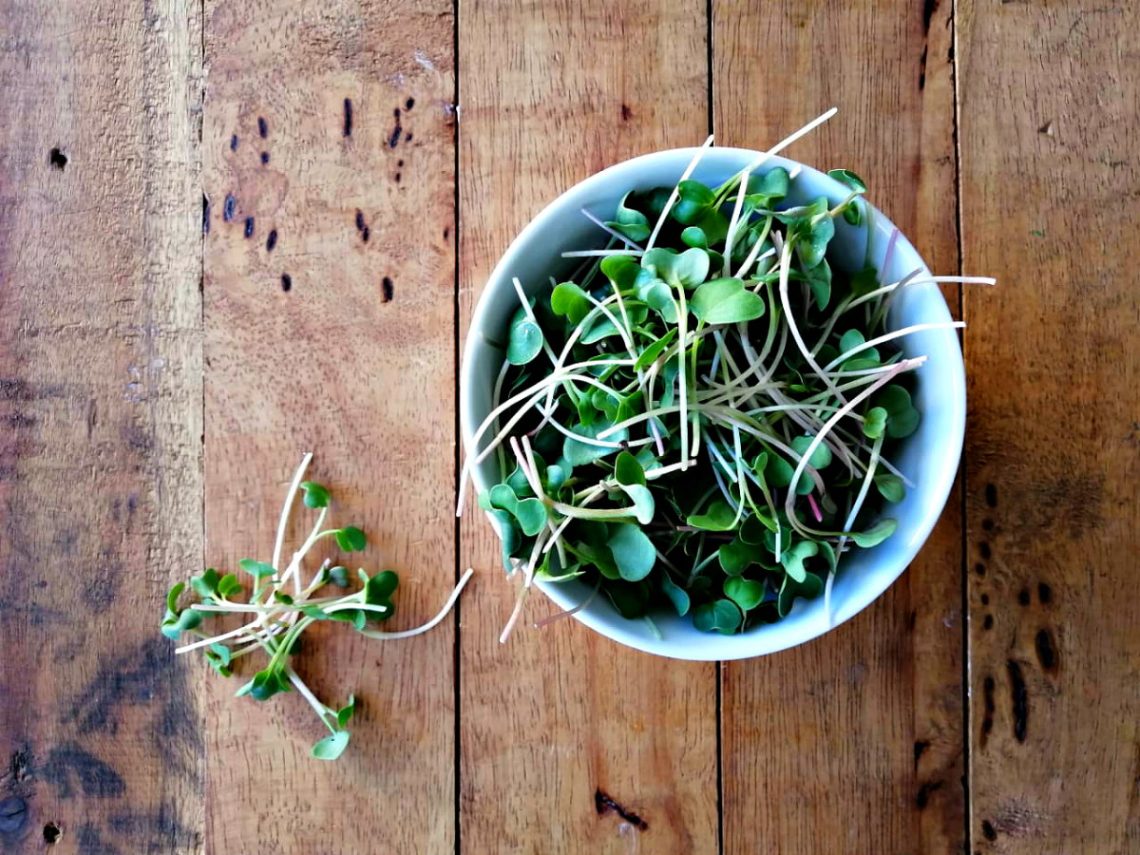
Anyways, I know I sound uber in-the-know about microgreens but I honestly only learnt about it about a week ago, when Eaton Greens asked me to try out some of their ninja microgreens. I was challenged to make a recipe using the power packed brocolli sprouts and cherry belle radishes. I mean, you obvz can incorporate them into basically any type of dish (salads, stews etc). But I wanted to be extra. And so here we are.
I give to you a DELICIOUS pesto recipe that is both yummy AND especially good for your body. What a score, right?
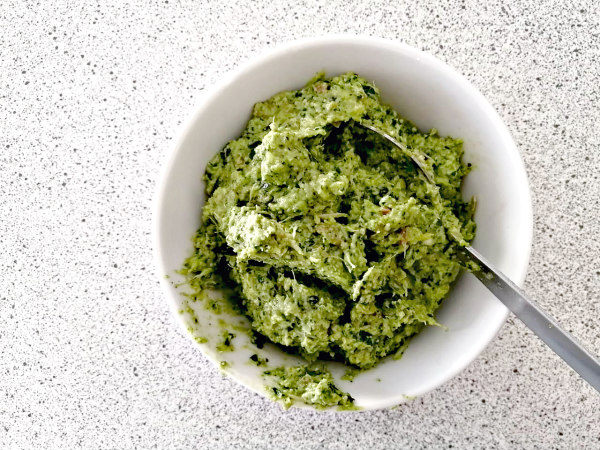
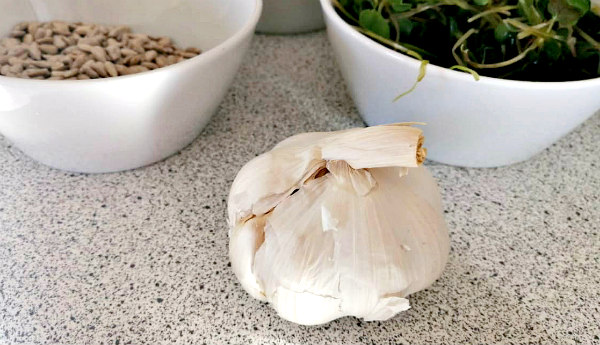 Broccoli Sprout Pesto
Ingredients
2 cups of broccoli sprout (you can use cherry belle radishes too – or mix them together!)
Half cup of parmesan cheese
Half cup of sunflower seeds
3 cloves of garlic (crushed)
Half teaspoon of salt
Olive oil as needed
Lemon juice as needed
Method
Add everything (except olive oil and lemon juice) to the food processor and blend, stopping inbetween to add a drizzle of olive oil and lemon juice until you are happy with the consistency. That’s basically it!
This pesto is very pungent and so devine! I stirred some into full cream plain yoghurt to make a creamy dip. Trust me, you want to try this! What a yummy way to get your nutrients in.
Eaton Greens stocks a variety of microgreens and they are so well priced at only R25 per tub. I love that their aim is to educate others on how to grow your own microgreens at home! In fact, they’ll soon be expanding their range and you will be able to pick up all goods (harvest trays etc) needed to harvest at home, straight from Eaton Greens. How cool, right? PE peeps can find Eaton Greens on Facebook or contact them via email or 064 902 1055.
If you try out my pesto recipe please drop me a message to let me know!
-
Instant Pot Creamy Pasta Recipe
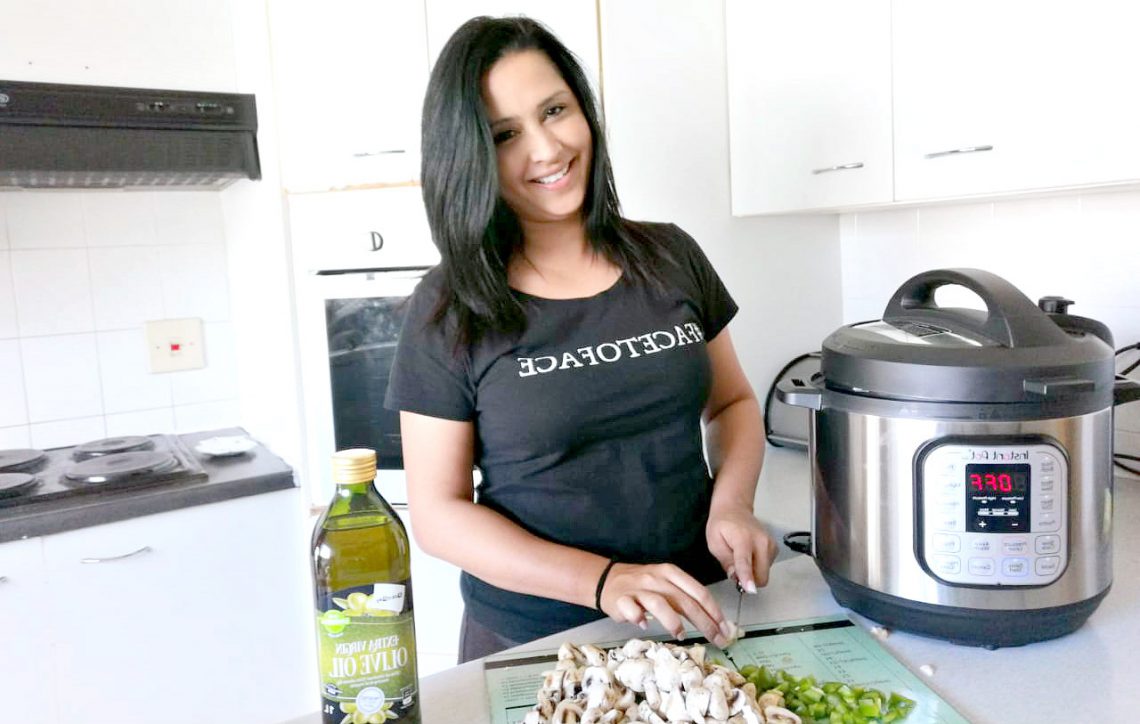
I’m the pasta lady, everyone knows this about me. A really special lady taught me how to make this creamy pasta dish and let me tell ya, my creamy pasta is unrivalled. (Unrivalled, you hear!! *shakes fist to the sky*) Anyways – dramatics aside – when I got my hands on my new Instant Pot Duo 7-in-1 I wondered if I would be able to make my creamy dreamy UNRIVALLED pasta dish in this glorious machine. I needed a one pot pasta (because mama’s busy) without losing flavour or creaminess (because creaminess is important okay).
Before I get right into the recipe I need to clip note: you can make this dish as fancy or as simple as you need. When pressed for time (or when my fridge is semi-empty) I use what I have and make it work. It tastes delish either way!
Instant Pot Creamy Pasta
Ingredients
500g of pasta (macaroni)
A punnet of mushrooms (chopped)
Greenpepper (chopped)
2 packets of cream of chicken OR mushroom soup
1 tub of fresh cream
500g water (Instant Pot)
500g of cheese (I love it super cheesey… your cheese, your call) (Oh and you’d want it grated)
Salt and pepper
Chicken breast – cubed
I usually add chopped pieces of pepperdew for that extra spunk, but this is optional
Instant Pot Method
Saute Mode
1. Melt a dash of olive oil and a spoonful of butter.
2. Add some garlic for flavor (I use chilli garlic).
3. Add chunks of chicken, salt and pepper, and saute.
4. Add chopped greenpepper and chopped mushrooms.
Don’t overcook these ingredients, you’re lightly sautéing it.Switch Off Instant Pot
5. Mix your chicken/mushroom soup with about 500g of water and add to pot.
6. Add fresh cream and give it a good stir.
7. Add your macaroni to the top and DO NOT MIX but do push down lightly to make sure that your pasta is just submerged. You may need to add a dash of water, based on how much meat you’ve added, but I usually just eye it to determine if your pasta is submerged enough. (Think: crocodile, not submarine)Pressure Cook Mode
Seal and cook on high pressure for 5 minutes.
When timer goes off, turn valve to “venting” to do a quick release.
Once you’ve been given the go ahead to remove lid, stir in your grated cheese and serve!
Yep – it’s that easy!Check out my video below – you know – for entertainment purposes, but also to see my facial expressions while I make this dish. Bon appetite!
-
Cooking with NESTLÉ for Healthier Kids
Can I let you in on a little secret? When it comes to the kitchen, I’m not exactly a cooking maven. In a nutshell, I have the culinary prowess of a french poodle. Ironically, I’ve noticed that my kids seemed to really enjoy spending time with me in the kitchen. They find the measuring and mixing particularly exciting and we usually end up sharing stories and silly moments while cooking up a storm.
So I was particularly thrilled to receive a special drop from NESTLÉ, introducing us to the NESTLÉ for Healthier Kids initiative. This global campaign champions happy, nutritional moments of togetherness between parents and kids. I mean, our kids do what we do. What better way to encourage healthy eating, than by doing it together?

It’s been proven that by getting kids involved in the prep of their meals, you are able to help them to adopt healthier eating habits that include more veggies, fruits and diversified protein sources.
I love that the NESTLÉ for Healthier Kids campaign strives to help 50 million children lead healthier lives by the year 2030. Their response to this very real need is to launch more nutritious foods and beverages worldwide to answer children’s nutritional needs, while providing nutrition education through school programs, as well as everyday tips and healthy recipes for parents.

These healthy recipes come in a super fun recipe storybook called Sam Dreams, with lead characters Sam and Nandi. I mean, storytelling is a fun activity, anyways, so what better way to get your kid thinking and talking about eating healthy than by speaking to their imaginations?
Using our NESTLÉ for Healthier Kids recipe storybook, Kari and Jo tried their hand at yummy flapjacks and healthy muesli bars. Both were a definite win!
Read up about the NESTLÉ for Healthier Kids campaign and download your very own NESTLÉ for Healthier Kids recipe storybook on the NESTLÉ website.
You can check out Kari and Jo’s cooking skills here:
NESTLÉ Nespray Big Moon Flapjacks
NESTLÉ Milo Treasure Chest Muesli Bars
Disclaimer: I collaborated with NESTLÉ and participated in the NESTLÉ for Healthier Kids campaign
-
MAGGI Hi Fibre Noodles – worth the hype?
I sometimes wonder if my kids are trying to Leon Schuster me. I mean, one day they love peanut butter sarmies and nothing else, the next day they shun my specially prepared sandwich as if it’s the plague. Come on – there HAS to be a camera hidden away somewhere, right?!
Seriously though, if getting them fed isn’t enough of a chore, one also has to consider WHAT we are feeding them. Nutrition plays a vital role in a child’s development. Proper nutrients keep your children healthy and strong. And regular. (Need I remind you of the Big Constipation Debacle of 2009?)
So I was especially thrilled to discover MAGGI Hi Fibre Noodles. I mean, its our fave two-minute noodles, with like, super powers. AACK! BUT will a change in formula withstand my picky eater’s taste test?
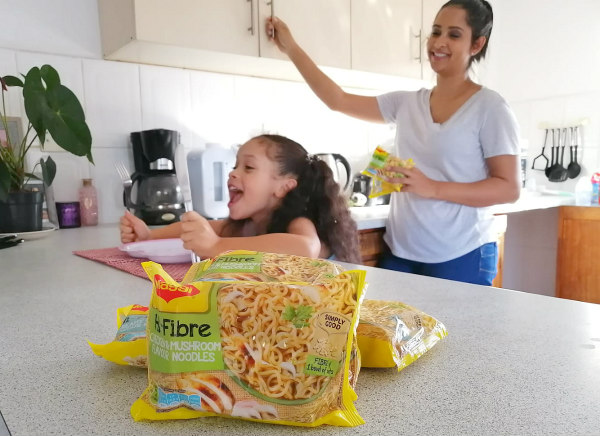 In case you didn’t know: MAGGI Noodles contain no artificial colourants and no added preservatives. I usually stock up on the multipacks because it’s such a convenient meal solution for my whole family. I add fresh ingredients (proteins or veggies or both) to make it a wholesome meal when I’m in a rush.
It’s the one to grab when my kids want a snack, and Miss Kari loves it, so I was a bit nervous to try out the new hi fibre variation on her.
Oh, and talking about hi fibre, did you know that a packet of MAGGI Hi Fibre Noodles has the fibre equal to one bowl of oats?! I mean, that’s kinda impressive for noodles, right? It’s made with Sunflower Seed Oil (so, lower saturated fats) and is a great source of Iron.
 Anyways, our verdict:
I was pleasantly surprised to find that preparation is still quick and easy! Simply add your water, pop it into the microwave (or on stove top) and ta da! Delicious noodles, ready to devour!Miss Kari decided to be the taste tester. After sniffing it out (yes, she actually smelled it) and then proceeding to subtely nibble on a noodle, before chomping down on a mouthful, my precarious little girl finally declared that they are “delicious!” (Her words, not mine). Whew! The relief! So thrilled that I can give her a bowl of hi fibre deliciousness now!
Check out the MAGGI website for a bunch of lekker recipes you can make, for your family, using their noodles.
Disclaimer: This post was part of a sponsored campaign for MAGGI.
-
Uhh, scrambled eggs and beef… together? {Quick recipe}
My grandmother was a chef of note. But, back then, we didn’t call her a chef… she was our Ma. And there were no fancy cookbooks or food blogs to guide her. My Ma Lamie cooked from her heart. And, truth be told, often her meals were a bunch of ingredients she had in her fridge, thrown into a pot, seasoned with a mix of the best Malay spices and, obvz, a dash of love.

One of my favorite “Ma Lamie dishes” was a mince and egg concoction that hit like no other meal could. I mean, I wouldn’t dare to scramble eggs into curried mince and call it a meal… but that mix, on a slice of thickly buttered bread, pretty much sums up my childhood. AND it’s flippen delicious!
I decided to introduce it to my daughter (she did not have the opportunity to meet Ma) as a way of passing down something from my grandma to her. I admit, I did boujee it up a bit and added extra ingrediants… not that it needs anything, its delish as is! Extra veggies will make it more heartier though. I use McCain veggies because they are precooked and prechopped so you don’t have to do any extra work. Score.
 Ma Lamie’s Scrambled Egg and Mince
Ingredients:
2 Diced onions and 1 diced green pepper
Punnet of mushrooms (cut as small as you’d like)
Spinach (I use the McCain bags)
500g Mince
6-8 Eggs
Method:
In a saucepan, brown your onion and then add your green pepper (I usually also add some garlic and ginger paste).
Add your chopped mushrooms and allow to cook through. Then add your spinach and cook until slightly wilted.
Remove from heat and empty pan. You’re going to need it for the next part.
Brown another onion and add your mince and your spices (for me that’s salt, pepper and paprika).
Once this has cooked through, add your veggies and mix well.
In a separate bowl, add your eggs, a dollop of milk (optional) and some salt and beat together.
Add your egg mix to the pan and use a big spoon or ladle (not a fork), to mix through, until eggs are sufficiently scrambled and cooked through.
 The beauty of this dish is that you can literally add as many veggies as you’d like. Or, if it’s that time of the month, simply brown your mince and add the eggs.
Oh and did I mention this is carb free too? I know, just when we thought it couldn’t get better! Please do let me know if you end up trying this at home! My Ma Lamie would be so proud!
Disclaimer: This post was done in collaboration with McCain
-
Making up for lost time this festive season
You’ll often find me flexing my Genius Mom status ’round about these parts because… well… I have five children, people. That’s five whole human beings whose lives I contribute to in a major way. I mean, let’s just say that three of them won’t have clean bums if I’m not around. So that’s, like, a pretty big deal.
But, because there are that many children under my care, I also have to find new ways of
making them believe that I’m amazingentertaining them. This was especially challenging this December because we’ve added our latest member to the troupe a mere four months ago!So, the other day, when our eldest turned a whole 18 years old (yes, I do realize that I am now parenting another adult) I decided to flex that Genius Mom muscle once again by incorporating as many kids as possible into baking Now-Adult-Son’s birthday cake. The result? Pretty epic, even if I do say so myself. (Which I do.) I mean, homemade baking just tastes better, right?
Now, I need to add a teeny tiny disclaimer right here: I don’t bake.
Like, if you had to rate my skills and abilities on a scale of 1 to 10, I would probably score a solid -11 when it came to baking. Yep, it’s real bad.But I know that baking is a labor of love. I needed to remedy this situation AND gain the respect and awe of my children simultaneously.
 So I was especially chuffed with myself for remembering that I had a box of Golden Cloud Cake Mix in my cupboard. Although, let’s be honest friends, I wasn’t going to pass out in shock if I flopped on this too. I mean, I’m okay with it. One can only have so many amazing talents (this is me trying to make myself feel better).
Anyways, I whipped out the cake mix box and quickly scanned the pretty straight-forward instructions. I only needed to add the “wet” ingredients… the rest was in the box, including yummy icing! That was such a score already!
I was also impressed that I didn’t need to have special cake-making-things to make the cake (you guys know what I mean, right?) There was no mention of fancy cake making tools and equipment. Needless to say, I felt like I was winning and the cake wasn’t evens made yet.
 We finally got cracking (literally, cracked the eggs, I know, I’m a lyrical genius) and, with the help of my kids, had the cake in the oven in no time! The icing was super easy to make and we got so much out of it, I could keep some aside for our Golden Cloud cupcakes (also so easy to make, my five year old practically did it by herself!)
The kids enjoyed decorating the cake. I enjoyed eating the cake. Both for obvious reasons. The result? It was super yummy and moist! Honestly, I was a little bit shocked… why didn’t anyone tell me that it’s this easy to bake a cake, yo?! I feel like the universe has been holding out on me!
 I’ve now stocked up on as many Golden Cloud mixes as possible. It’s such a great way to make up for lost time AND, if you involve them, you get to be creative with your family. We are loving the cuppacino muffin mix and my kids are begging me to try the bread/dombolo mix! My sussie and I whipped up some scones for her Ma the other day and, I must admit, it felt good to beable to casually mention that I had just “popped them into the oven earlier”. Watch out Cake Boss, I’m coming for you!
Have you tried the Golden Cloud mixes? Which are your faves?
Disclaimer: This post was done in collaboration with Golden Cloud
https://www.facebook.com/watch/?v=729439874223131
-
Festive feeding: carb free tuna dish with KOO {Giveaway}
When it comes to festive eating, I only have 3 requirements: quick, easy and yummy! Oh and it would help if it’s good for my body too. Because of this (and because I like to work smart, not hard) I revised a delish Tuna Mornay recipe that I had spotted online. The recipe is CARB FREE (that’s right… call it a unicorn, I don’t mind) and the ingredients are basically 2 tins of tuna, some cheese, and as much KOO tinned goodness, as you’d care to add. That easy!
Fortunately, KOO’s ever expanding “bean family” comes with new flavours this festive and I ain’t mad at it! First of all, can we talk about the KOO Black Beans in Mexican Sauce flavour?! If you’re as big of a Mexican foods fan as I am, then your heart probably did flip flops just reading that, karnal!
 I’ve also been eyeing a delish-sounding KOO Baked Beans in Chilli Wors flavour and I’m still crazy about the KOO Cape Malay Curry flavour.
For my recipe today, I am using some of our fave KOO tinned veggies… you know, the ones you simply can’t do without. This recipe is kind of like a “choose your own adventure” book – you know, you get to choose which flavour journey you want to go on. And guess what, no matter what you choose, you’ll probably STILL enjoy this dish because it’s that flexible. It’s perfect for Summer feeding! Check it out:
 Easy Peasy (no carb) Tuna Mornay
Ingredients:
1 onion
2 tins of tuna (either in brine or water, doesn’t matter, because you’ll be draining it)
Cheese (as much cheese as your cheesy lil’ heart can stand)
1 tin of KOO Creamstyle Sweetcorn
1 tin of KOO Whole Kernel Corn
1 tin of KOO Garden peas
You can add any flavour of KOO mixed veg, but remember that too much sauce might change the consistency, so balance the sauce out with more whole kernel corn or peas.
Spice for flavour (I usually do without any! It’s that wholesome and good!)
 Method:
 In a large pot, brown your onion and add your drained tuna and brown together for about 5 minutes.
Add all your “unsaucy” veggies to the mix. Cook together for about 3 minutes.
Add your binders (your saucy tins, i.e. the creamed corn). Allow to cook for another 3 minutes. You can add your spices now. Again, I don’t add any salt or spices to this dish.
Transfer your final mixture to an oven dish and stir in some grated cheese, finally topping the dish off with a layer of grated cheese.
Pop into the oven until your cheese is nice and golden/gooey. (I prefer gooey over golden).
 And that’s that. A quick veggie based dish that doesn’t take a gazillion years to put together and it’s flop proof! As I’ve said before, I would add one of the KOO mixed vegetable variations, if i’m looking to change it up. You can totally make it your own!
So what do you think friends? Would you try this at home?How would you make it your own, if you do?
 Win a KOO hamper valued at R500!
KOO wants to give you a festive hamper filled with some of their classic and newer product offerings, as well as some funky KOO branded items!
To enter, simply follow the prompts below:
1. Find the specially marked post on Instagram and follow instruction to grab 1 entry.
2. Find the specially marked post on Facebook and follow instruction to grab 1 entry.
3. Comment below and let me know which of the newer KOO tins you’d like to try, to grab 1 entry.Giveaway open to SA residents only. Winner announced on 6 December and has 24 hours to claim prize.
(EDITED: The KOO giveaway has been extended! Winner to be announced on 16 December.)
This review and giveaway was done in collaboration with KOO South Africa.
-
Easy peasy KOO Cape Malay curry homemade pie (can feed a family of very many people)
Friends, I’m not the best cook in the world. In fact, I’m downright unimpressive when it comes to kitchen stuff. (I just referred to cooking as “kitchen stuff”… point and case). So, when I find a recipe that is quick, easy and tastes delicious, best know that I’m going to brag about it on this here blog and basically make it whenever you invite me over for a bring and share.
At our blogger event, the kind people over at KOO gave us a hamper filled with some of their yummy tinned veggies and I knew I had to do something with it (I mean, besides for give them to a family member with the hint of “here, cook for us.”)
 I was kinda excited because I spotted some of the new KOO iconic curry sauce flavours in the press drop. Dude, you need to check this out! KOO – the country’s fave canned food brand – introduced a range of curried mixed veggies to the shelf, in Durban Curry and Cape Malay Curry sauces! And believe me (because it’s food, I don’t joke about food) these flavors are legit! I mean, I had to try them out in a dish!
I visited the KOO website for ideas and spotted an easy homemade pie recipe. I mean, it seemed simple enough. The recipe was for individual pies though, and as you know, my family (filled with very many people) are usually ravenous come supper time. So I decided to adapt the recipe a bit to make a large oven pie instead. I am absolutely, without a doubt, impressed with myself. Here’s my recipe:
Disclaimer: Now, friends, if you’re like me (a very undomesticated goddess who wonders why her husband hasn’t tried to trade her in for a Martha Stewart type) then this recipe is for you. It’s easy, doesn’t require any cooking skill at all (obviously) and is one of those quick meal ideas. If you’re looking for something a bit more fancier, look away, my friend. You will not find that here.
 Easy peasy homemade pie (can feed a family of very many people)
Ingredients:
1kg minced beef
Salt and freshly ground black pepper, to taste
1 egg (beaten)
2 medium onions, chopped
3 cans (410g) KOO MIXED VEGETABLES in CAPE MALAY Curry Sauce
2 rolls of Puff Pastry
You can add cheese (I like it cheesy)
Fresh herbs to garnish if you’re that person. (I’m not that person)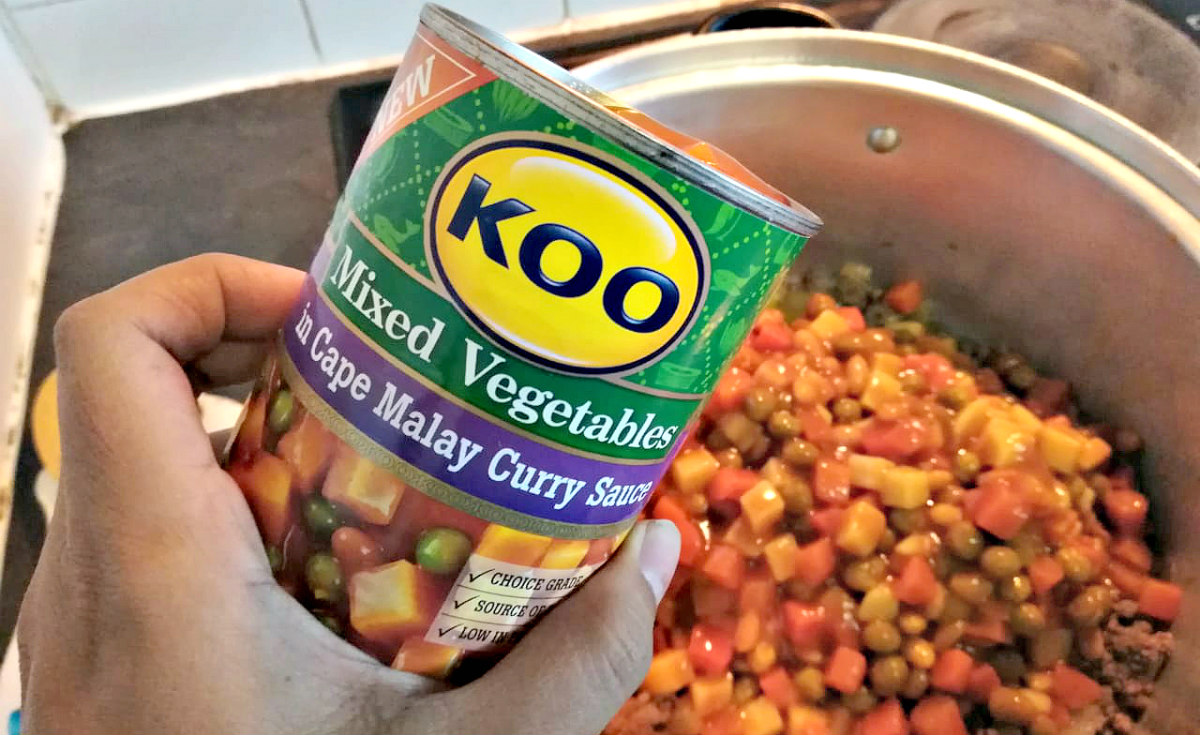 Method:
Pre-heat the oven at 180 degrees C.In a large pot, brown your chopped onions (I usually add garlic and ginger, because that’s what my mother does) and eventually add in your mince. Season with some salt and pepper and cook until brown.
Add your KOO Cape Malay curried mixed veggies to the pot and allow to cook through. (You’re welcome to add salt and seasoning to taste, but I found that it needed very little to no extra salt… all the flavor is there already!) Allow your concoction to cool.Roll out one package of Puff Pastry and press into your oven dish, making sure it overlaps the sides nicely. (Please note, I definitely used Spray And Cook in my oven dish before I pressed my pastry in. Maybe you should too.) Stick your pastry into the oven for a couple of minutes. You want it to be a golden brown.
When it’s ready, remove from oven and scoop your cooled Cape Malay stew into the baked pastry base, adding the second (raw) layer of pastry on top, like a lid.
Brush egg on to the top of your pastry. Stick it in the oven and give yourself a high five because you just made a whole pie without using Google.
Bake for 15 to 20 minutes (or until it’s nice and golden).And that’s that. I wish I had more to share, or could tell you guys how I discovered an easy way to do something, but nope. It’s that plain and simple. I’ve never baked with a KOO product before and I must say, this experiment was pretty darn delish!
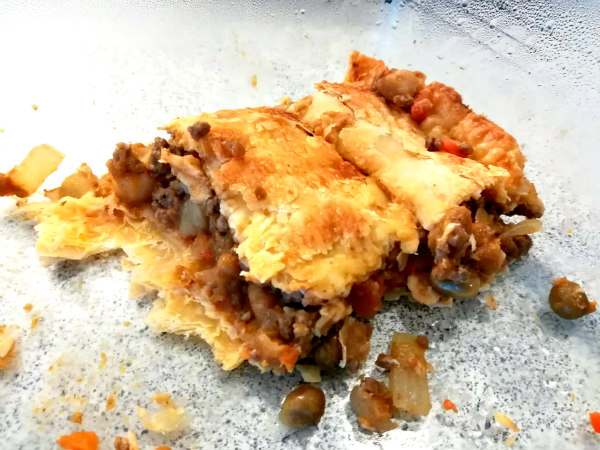 If you want to try out the original KOO Crusty Homemade Pie with Curried Mixed Vegetables recipe that this was adapted from you can find it here.
The KOO curried mixed vegetable range, retailing for approximately R17.99, is available from retailers and supermarkets across the country. For meal inspiration and delicious recipes visit – www.koo.co.za.
Header image: KOO
Disclaimer: Also, KOO sent me this product to try out. -
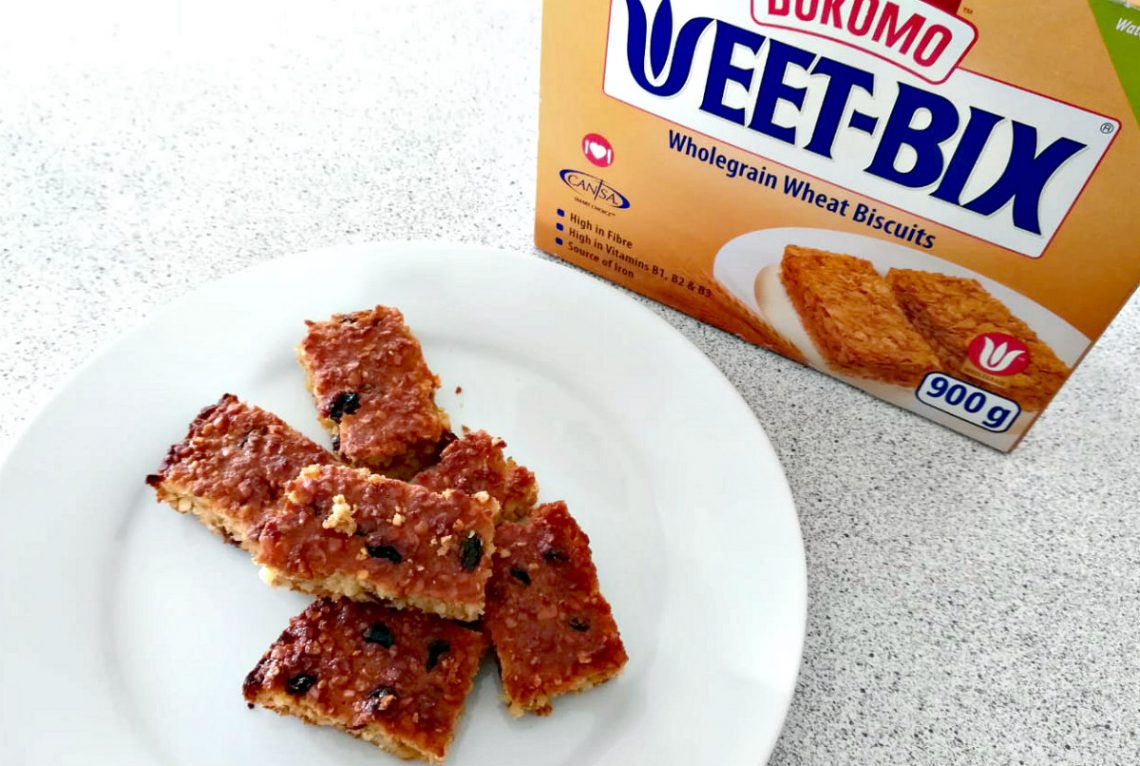
How I made a breakfast bar using WEET-BIX!
My family has an ongoing love affair with WEET-BIX, you guys. I mean, seriously, besides for it being a fave in terms of breakfast cereals, it has also become my teens go-to midnight snack of choice. Do I understand it? Not always. Have I embraced it? Uhm, definitely! I mean, I’m not completely opposed to its wholesome goodness. It also helps that it contains 97% of wholegrains, no preservatives or colorants. (And let’s not forget the deliciousness factor… very important IMO).
But that’s not what you came here to learn. You came here to find out how on earth I made a breakfast bar using WEET-BIX. (Me, with my limited knowledge of baking. I did it. Can somebody give me a high five please?)
Well, for starters, you need to know that I did not devise the amazingly easy recipe myself. I mean, my Hubstopher will confirm that I am a low-key genius. (Right, babe?) But alas, I cannot take credit for this one. I actually spotted the recipe on the WEET-BIX My Way mobi-site. The site is filled with a ton of really great recipe ideas that kinda inspires you to eat your WEET-BIX a lot differently compared to how you usually would enjoy it.
Whether you’re a smoothie kinda person, or you like that extra crunch in your mac and cheese, or you’re daring enough to enjoy it with atchar and chillies, there are so many different ways to incorporate your favorite wholegrain breakfast cereal into your everyday snacks and meals.
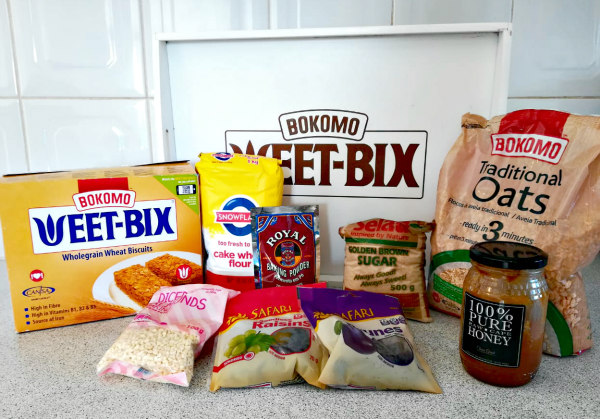 Right, back to me being impressive with my WEET-BIX breakfast bar. Here’s how I made it:
Ingredients
WEET-BIX crushed
Flour
Baking powder
Rolled oats
Brown sugar
Fruit and nutmix
Eggs
Milk
Margarine
Honey
You can find the exact measurements on the mobisite over here.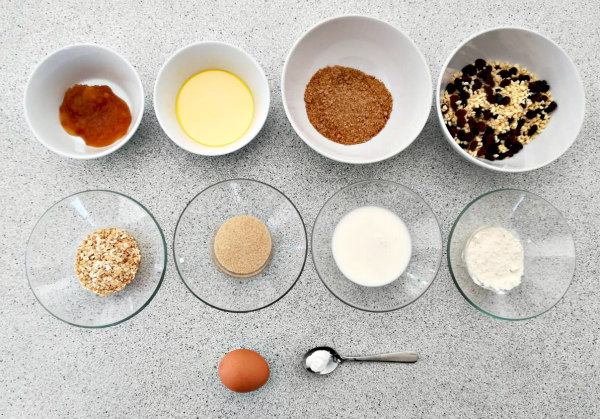 Method
Mix together the flour, baking powder, crushed WEET-BIX, oats, sugar, fruit and nut mix.
In a separate bowl mix your egg, milk, margarine and honey.
Then combine the concoction with your dry ingredients.
Press the final mix into a prepared tin and bake in a preheated over for 25-30 minutes.
Once baking is done, take out of oven and allow to cool, before cutting it into bars.
You can find the exact method on the mobisite over here.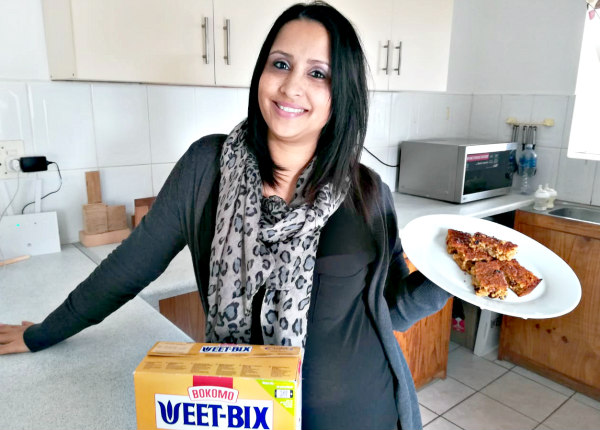
GIVEAWAY
(This giveaway is closed)
Will you be giving this a go? Or have you spotted an interesting WEET-BIX recipe on the mobi-site? Well, friend, try out one of the cool recipes from the site, take a snap and tag me on social media and you could win a R500 shopping voucher, compliments of WEET-BIX! Giveaway ends on 28 May 2019. Winner announced on 29 May 2019.
-
strawberry jam so easy my teen made it!
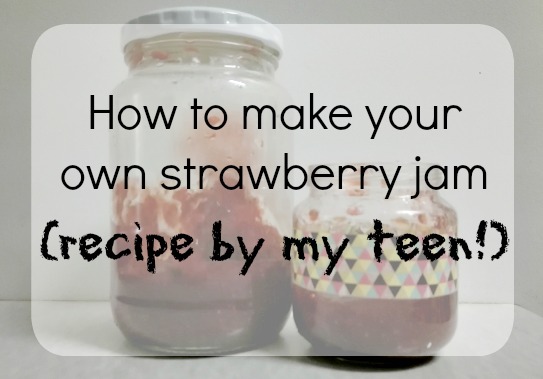
If you frequent these here parts, you’ll know that my boy is an aspiring chef. The kid wants to cook. Who am I to stand in his way? A few weeks ago he attempted to make jam as part of a class assignment (what are they teaching kids at school now a days? I likey, I likey alot) He insisted on making the jam himself, but I had to, of corse, step in. We all know that mom knows it all.